Two finishes for a neat edge which helps to counteract rolling:
Crocheted bind-off - no crocheting skills required, but you will need a hook:
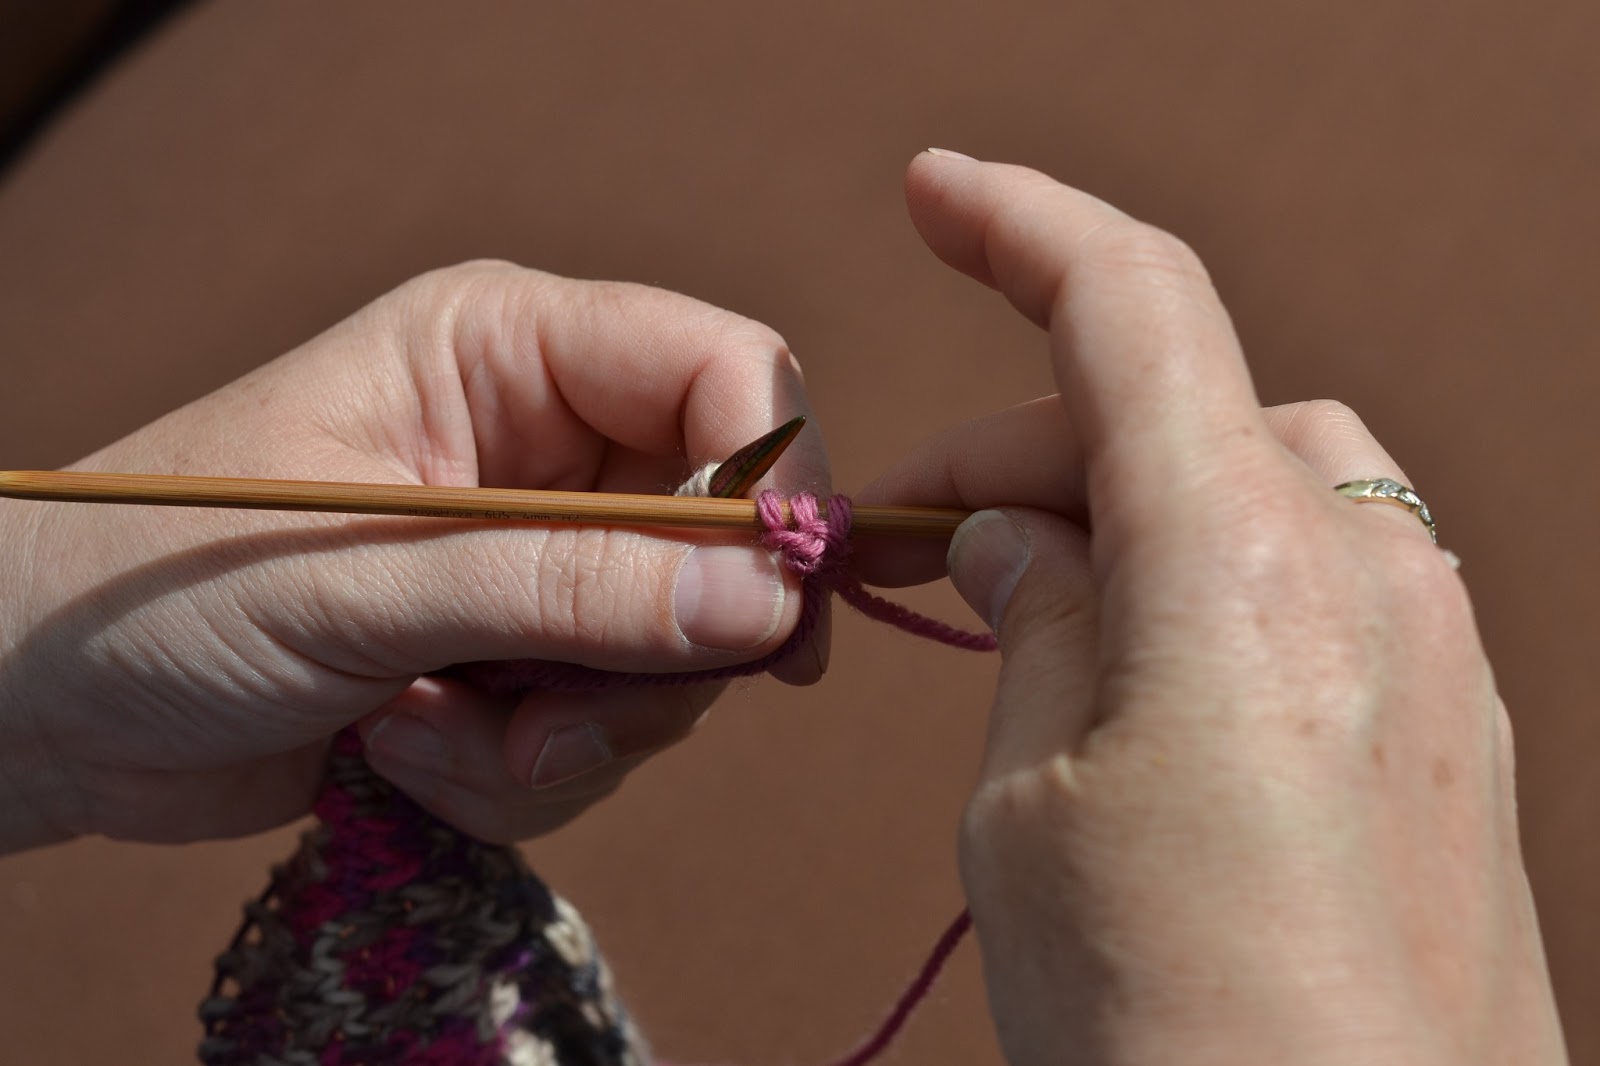
Transfer the first stitch to your crochet hook (1 st. on the hook)
1. use the hook to pull up a loop through the 2nd stitch (2 sts. on the hook)
2. use the hook to pull another loop through the 2 stitches (1 st. on the hook)
Repeat steps 1 + 2 until you have no stitches left.
Cut the yarn leaving a tail.
Put the end through the last loop to secure.
Edging - you can use the same technique to work a border along a side edge or a cast-off edge.
In Step #1 insert the needle through the stitches at the edge and pull up a loop. The rest is exactly the same.
I-cord bind-off
Most instructions for i-cord bind-off tell you to transfer the stitches back to the left needle.
I find it's much better to use 2 double pointed needles (dpn's) and slide the stitches along.
This reduces the risk of:
- dropping a stitch
- stretching the stitches
- splitting the stitches
Start by casting on 3 or 4 stitches on one of the dpn's.
1st row:
a) k2 (or 3)
b) slip the next stitch purlwise
c) slip the first stitch to be cast off knitwise (kw)
Transfer the last 2 stitches back to the left hand needle.
d) k2tog tbl (knit 2 together through the back loop)
e) slip the next stitch knitwise (as you did in step c)
f) slide the stitches along the dpn so that you start the next row at the opposite end (the one furthest away from the stitches you are binding off). Use the other dpn for the next row.
All other rows:
- k2 ( or 3) (as in step a)
- k2tog tbl (step d)
- slip 1 knitwise (step c)
- slide the stitches along the dpn and start the next row with the other dpn (step f)
Repeat until you have no stitches left, then bind off.
Edging (attached i-cord) - basically the same, but instead of using live stitches in Step #3, you pick up new stiches by inserting the needle along the edge and pulling up a loop to create a new stitch. Then continue with Step #4.